Showing posts with label party nails. Show all posts

Sunday, April 7, 2013

Girly Girl Nail Art Challenge - Week 2 - Gimme That Bling!!!

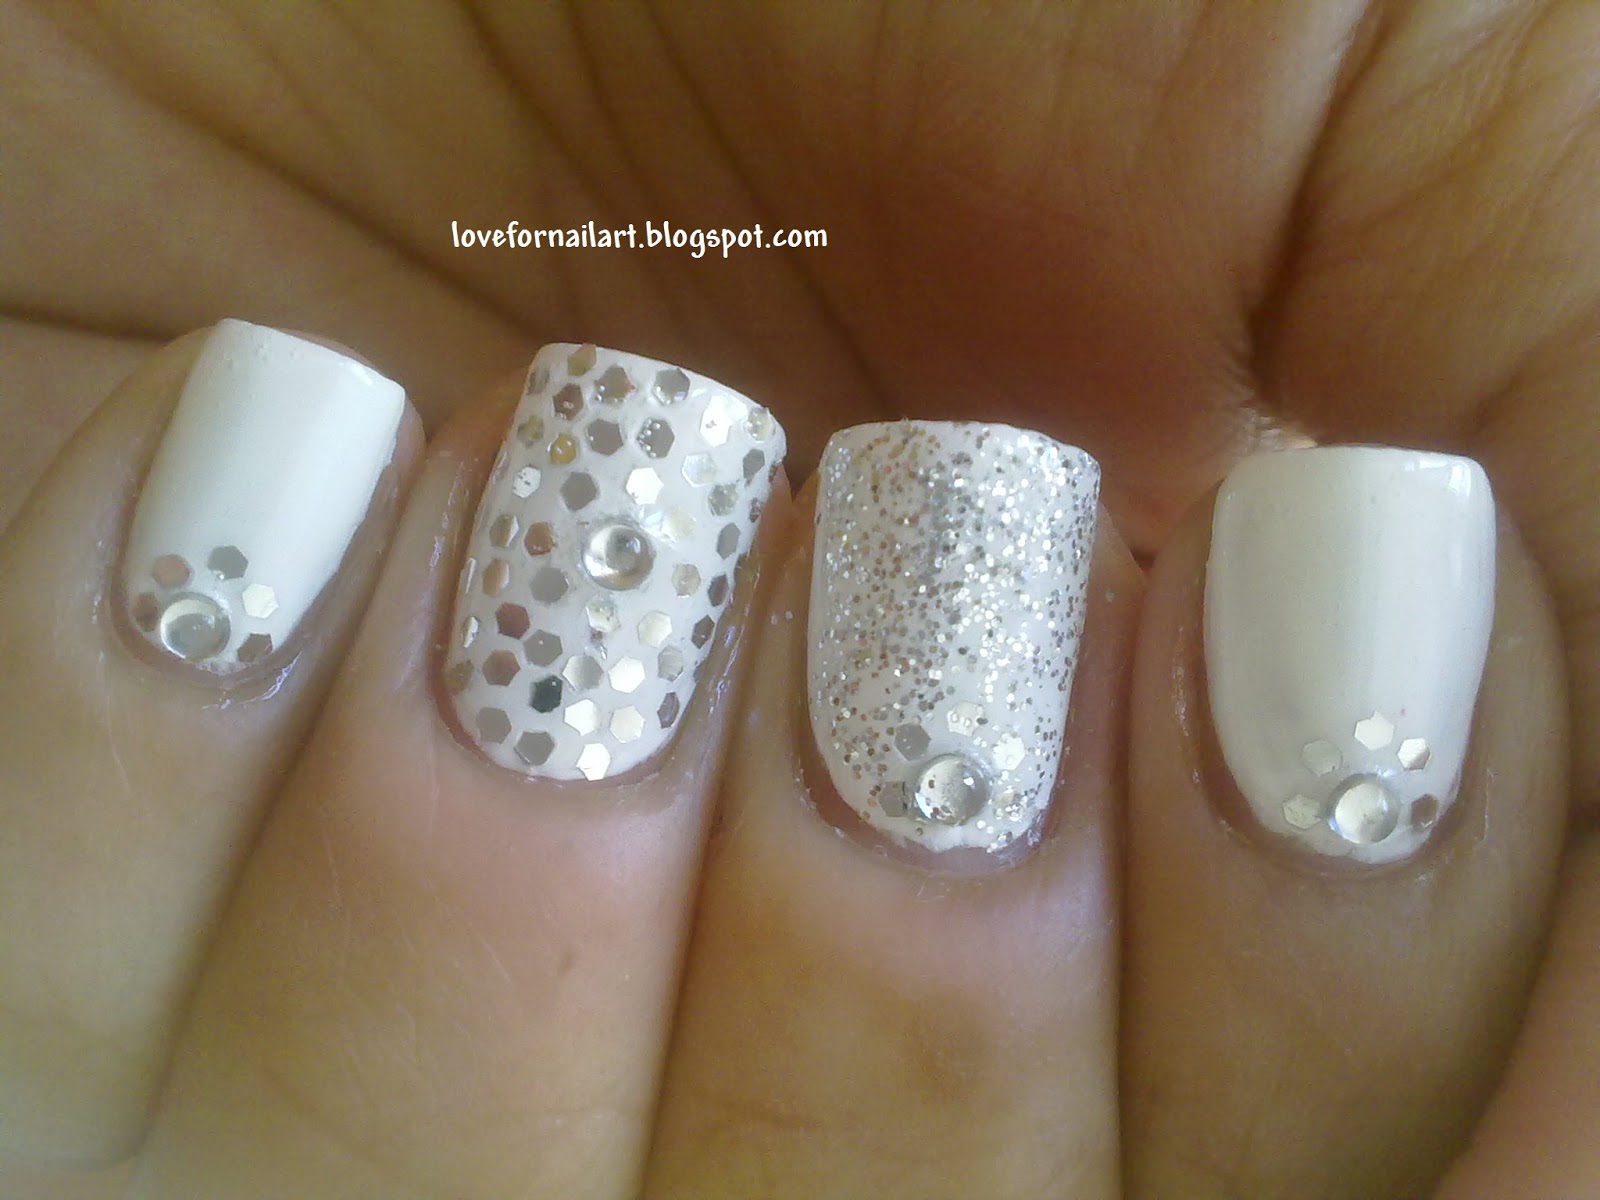
Hello Girlies!! Here I am with my week 2 mani for the Girly Girl Nail Art Challenge hosted by Mani's by Moore and Closet Diva . This was supposed to be posted on friday, but I am a little late. The theme for Week 2 is Gimme That Bling and I have these glitter nails for the same. I somehow liked this mani more in real life than in photos. I think the nails were more sparkly in real. But, here is what I have captured :) . Hope you like it :)!! Do join us if you like the themes!!

Girly Girl Nail Art Challenge

1. Think Pink
Wear your favourite pink nail polish and nail art.
2. Gimme That Bling
Diamonds are a girl’s best friend, so put some sparkle on those nails.
3. Delicate and Elegant
Adorn yourself with a lovely pattern, colour or technique
4. Inspired by the Runway
What is your favourite trend this season? Show us your stylish nail designs!
5. Gotta Love Chick Flicks
We can’t resist! Wear a nail design inspired by your favourite chick flick.
6. Who Inspires You?
Show some love to your favourite female role model by creating gorgeous nails in their honor.
7. Sugar, Spice and Everything Nice
That’s what little girls are made of! Show off your sweet (or spicy) inspired nails.
8. Girls Just Wanna Have Fun!
It’s true, we do! Let your nail designs show us how fun-loving you are!


I used..

Firstly, Apply a base coat and two coats of white nail paint.
Apply a clear polish to the ring finger nail and stick a silver or clear rhinestone in the middle.
Then stick on silver sequins around the rhinestone as shown.
Then stick another round of sequins..
 Repeat the same so as to fill in your whole nail with sequins.
 Then, to the other nails, using a clear polish stick silver rhinestone near to cuticle area as shown.
Stick some sequins around the rhinestone as shown.
For the middle finger and thumb, apply silver glittery polish.
Finally, add a top coat to all the nails and done :)!!


So, what do you think? Do let me know by commenting below and don't forget to join me for more updates :)!


Let's go and see what the other lovely ladies came up with :)!!


Saturday, March 23, 2013

Blue and gold glittery nails


 Hello Girlies!! Today I have for you this glittery party nail design which is my last minute entry for the Crumpet's Amateur nail art contest for the month of march. The theme of this month is "Blue". Today is the last day of submission and the voting will start tomorrow :) ...You can check all the entries( including mine :) ) here and don't forget to vote for your favorite design :)!!


I used..


 Firstly, Paint your ring finger and thumb with gold nail polish and the remaining fingers with blue.
Add a glittery gold polish to ring finger and thumb.

 Then one or two coats of chunky glittery gold polish.
 For the remaining fingers, using a nail art pen create a curvy line. For this start at one end of the nail and fill in the whole nail with a continuous curvy line. There is no particular way of creating this. The main idea is to fill in the whole nail :) .
Add small gold sequins randomly, to the curvy line. I used a toothpick dipped in water to pick the sequins.
Finally, apply a top coat to all your nails and done:)!!


So what do you think about these nails? Do let me know in your comments and join me for more updates :)!!

Saturday, February 16, 2013

Colorful rhinestones glittery nails

  Hello there!!! Back to blogging after a busy day! Today's manicure is super easy and best suited for parties Hope you like it :)!!


I used .....


Start by applying a base coat and two coats of your base color.


Apply mixed colored glittery polish to all the nails except and thumb and ring finger.


Apply clear polish to thumb and while still wet, put some rhinestones randomly. I used a toothpick to pick up the rhinestones and chose the colors based on the colors in the glittery polish. Repeat the same to your ring finger. Finally Apply a top coat and you are done!!


Wednesday, February 6, 2013

18 Karat gold leaf nails

                                                Here is today's design. I have been coming across almost everywhere, the 18 Karat gold nail polish. I love the gold leafy look but the price is very high. I tried to get the same look in a cheaper way, using gold graffiti or crackled nail polish and here is the outcome. Hope you like it!!


Nail polishes used


Let's begin!!!

1. Apply a base coat and two coats of a dark colored nail polish of your choice and let it dry completely. I have used green colored nail polish here.
2. Now, randomly dab on the gold crackled or graffiti nail polish on to the nail. Do not apply to the complete nail. Just dab randomly.
3. Wait for 30 sec for the cracks to appear.
4. Finally add a top coat and you are done:)!!! Don't forget to leave your comments below:)!!!

Wednesday, December 5, 2012

Glittery gradient nails


For this design, you will be needing a makeup sponge to get the gradient effect. It is easy to do and will dry fast:)

Glittery gradient nails

Glittery gradient nails


Nail Polishes used

Glittery gradient nails

Let's begin!!!!

1. Apply a base coat to your nails and paint them with one or two coats of dark nail polish of your choice and let them dry.
2. Apply the white polish onto the makeup sponge and dab it on a paper to remove excess polish. Now starting from the tip of the nail and moving down dab the sponge on the nail, so that 3/4th of nail is with white polish. Do the same with all other nails.
3. Then apply the glittery polish onto the makeup sponge and remove the excess polish from it by dabbing it onto a paper. Now starting from the tip of the nail, dab the sponge on the nail to cover almost half of the nail with glittery polish. Follow the same for remaining nails.
4. Clean the nail polish on the skin around the nails using a Q-tip dipped in nail polish remover.
5. Finally apply a top coat and you are done!!!

Monday, November 5, 2012

Crackled glittery party nails


                                                     To get this look what you need is a glittery polish of your choice and a contrast crackle nail polish. I love the crackled effect as it is very easy to do, takes less time and looks great on all lengths of nails.

Crackled glittery party nails


Crackled glittery party nails

Nail polishes used

Crackled glittery party nails

Let's begin!!!!

1. Apply a base coat.
2. Apply two coats of glittery nail polish(I used silver glittery nail paint here) and let it dry.
3. Then apply a layer of cracked nail polish on the top of silver nail polish and wait few seconds to see a crackle effect.
4. Finally apply a topcoat and you are done!!!!